How To Tie A Bow - Simple Steps For Beautiful Creations
Making a lovely bow can really make a difference for gifts, home decorations, or even your clothes. It’s a simple way to add a special touch, showing you put thought into something. You can learn how to create your own ribbon bows for wrapping presents, giving them a truly personal feel, and that, is that, a pretty nice thing to do.
So, instead of just grabbing a pre-made sticky decoration, think about learning a new ability that lets you craft something truly unique. This skill can come in handy for many different occasions, whether it's a birthday, a holiday, or just a little something to brighten someone's day. It's actually quite simple to pick up, and you might find it pretty enjoyable, too it's almost a relaxing activity.
We'll walk through some easy ways to get started, covering various styles and helpful hints. You'll soon discover how simple it is to make something truly eye-catching with just a bit of ribbon and some practice. You know, it really makes a present feel more considered, which is a lovely feeling for the person receiving it.
Table of Contents
- Why Learn How to Tie a Bow?
- Getting Started - How to Tie a Bow with Basic Ribbons
- What About Different Kinds of Bows - How to Tie a Bow in Various Styles?
- How to Tie a Bow on Your Clothes and Accessories?
- Beyond Gifts - How to Tie a Bow for Craft Projects
- Troubleshooting Your Bow - How to Tie a Bow Perfectly Straight?
- Making it Easy - How to Tie a Bow with Helpful Resources
- A Few More Ideas for How to Tie a Bow
Why Learn How to Tie a Bow?
There's something really satisfying about handing over a gift that looks absolutely perfect, isn't there? Learning how to tie a bow lets you add a truly personal flourish to your presents. You get to make something that looks far more special than anything bought from a shop, and your friends or family will surely be delighted by your creative ability. Basically, it’s a way to make your gifts stand out in a lovely way, and that's pretty cool.
Plus, thinking about those sticky, pre-made bows from the store, they sometimes just don't quite hit the mark, do they? They can be a bit flimsy, and once they're off the gift, they're usually tossed aside. With your own handmade ribbon decorations, you're making something beautiful and, in a way, more lasting. These can be saved, perhaps even used again, making them a nice, thoughtful choice. So, you know, it’s a bit more eco-friendly, too.
It’s really about giving your items a unique touch. Whether it's a birthday present, a holiday treat, or just a little token of appreciation, a hand-tied ribbon makes it feel extra special. It shows you took the time to make it look just right, and that sort of care is always appreciated. You can, for instance, coordinate colors and textures exactly as you wish, creating a truly custom look, which is actually very rewarding.
- Frank Sheeran
- Lee County Arrests
- Cortes De Pelo Para Ni%C3%B1os
- Trump Security Clearance Suspension Perkins Coie
- Celebrity Jihad
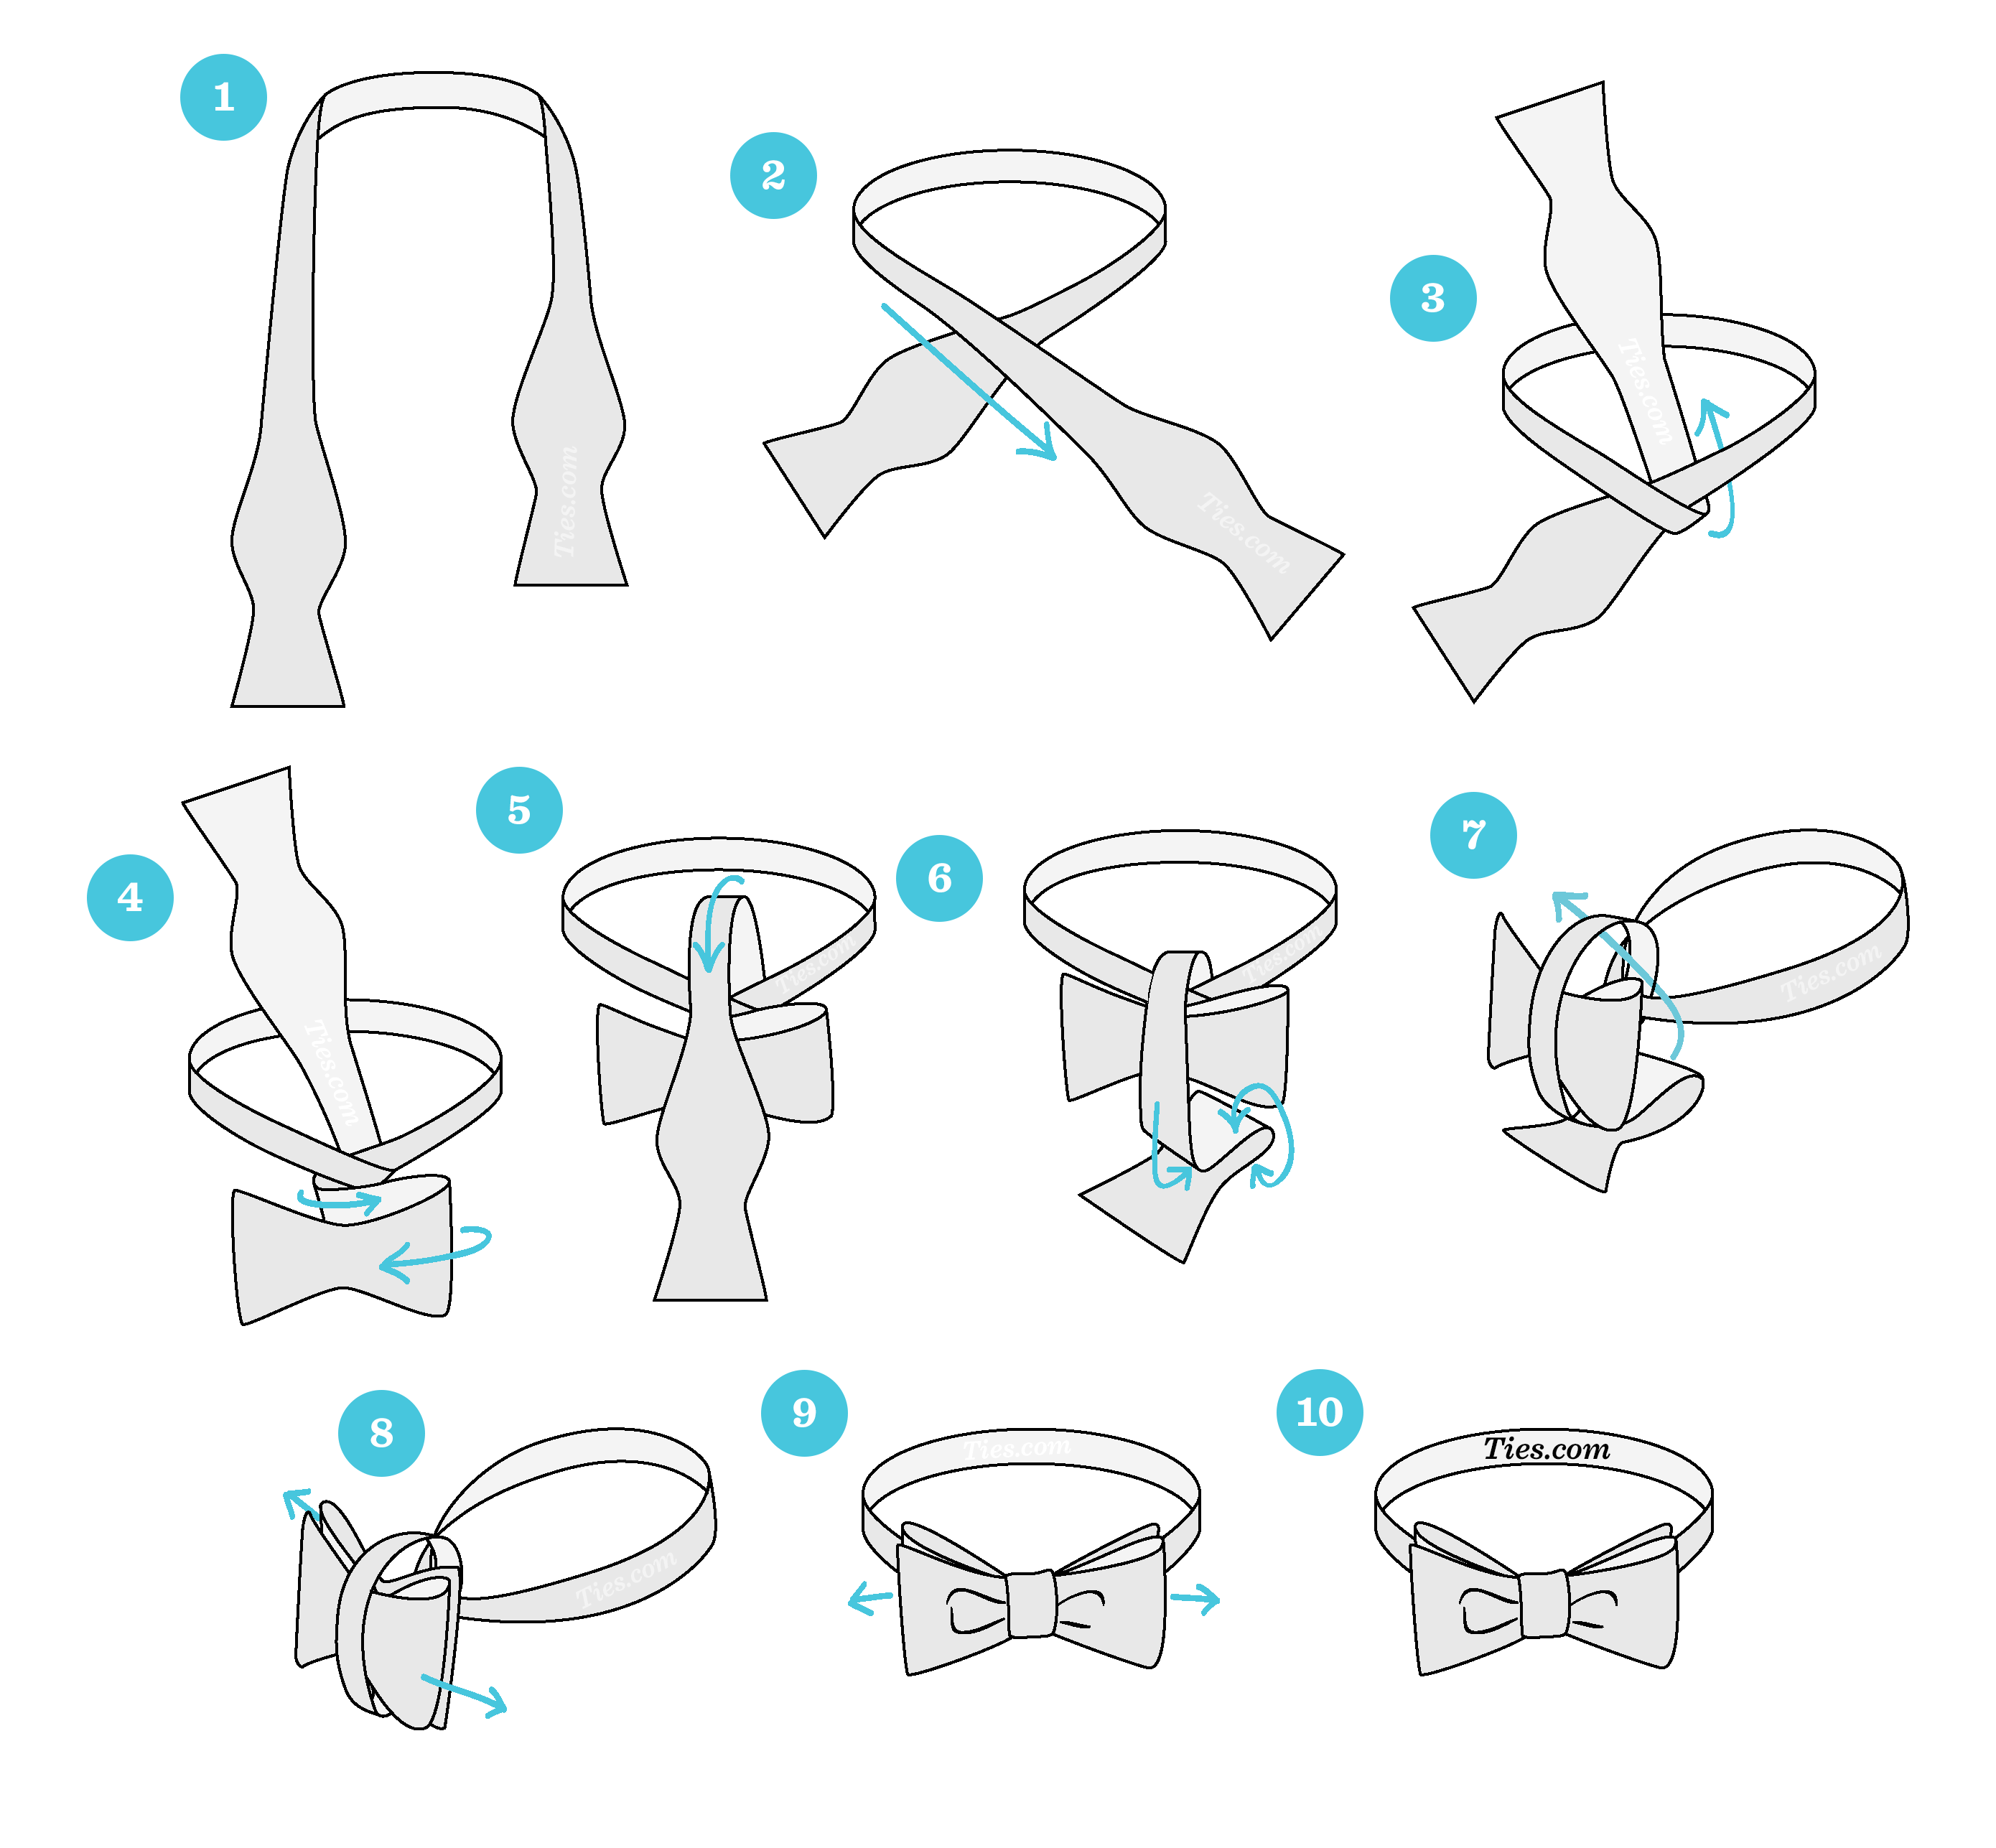
Getting Started - How to Tie a Bow with Basic Ribbons
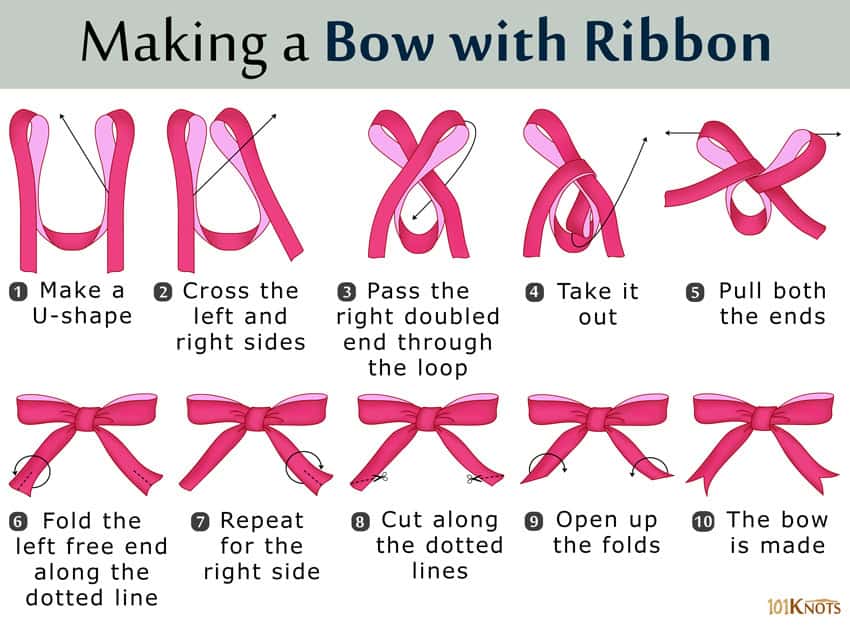
Figuring out how to tie a bow for your presents doesn't have to be a big puzzle. We've got some simple ways to guide you through making those pretty ribbon additions for gifts, especially for special times like Christmas. You don't need any special tools or fancy equipment, just your hands and some ribbon, which is pretty much all you need. You can use thin ribbon for a delicate look or something thicker for a more substantial feel, depending on what you like.
One of the easiest ways to get going is with a classic gift bow. This is the kind you see often, and it's quite simple to get the hang of. You can use a ribbon that's a bit on the thicker side for this, or even one with a wire inside. A wired ribbon, you see, helps the bow hold its shape better, making it look a bit stiffer and more structured, which is really nice for presents that need a bit of a formal touch.
There are actually four or five different methods you can try to create a lovely bow. Each one gives a slightly different result, so you can pick the one that best suits your project or your personal taste. Some are quite quick to make, while others might take just a little more patience, but the outcome is always worth it. Basically, it's about finding what feels right for you and your materials.
What About Different Kinds of Bows - How to Tie a Bow in Various Styles?
Once you've got the basics of how to tie a bow down, you might want to try out some other interesting types. You can choose from a simple, flat bow, which lies neatly against your gift, or perhaps a folded one that adds a bit of dimension. There are also layered bows, where you stack different pieces of ribbon for a richer appearance, and even something called a tiffany bow, which has a very refined look. Each style, really, offers a unique visual appeal.
When you're picking your ribbon, consider what kind of effect you're hoping for. For instance, if you want a bow that stands up nicely and has a bit of body, you might lean towards a slightly thicker ribbon. Ribbons with a bit of wire along the edges are particularly good for this, as they let you shape the loops and tails just how you want them, and they stay put. This is pretty useful for making sure your creation looks just so.
You can also think about how the ribbon will wrap around a box. Some ribbons are better for making smooth lines, while others might be more prone to creating little bumps if not handled with care. A good tip is to choose a ribbon size and shape that fits the item you're wrapping. A very wide ribbon on a tiny box, for example, might look a bit overwhelming, while a thin one on a large package could get lost. So, it's about balance, you know, finding the right match.
How to Tie a Bow on Your Clothes and Accessories?
Tying a bow isn't just for gifts; it can also add a nice touch to your clothes, especially belted items. If you've got a dress or a coat with a belt, knowing how to tie a bow in a neat way can really make your outfit look more polished. It's a simple little detail that shows a bit of care in your presentation, and it's pretty easy to get the hang of. You might be surprised how much of a difference it makes, actually.
Here’s a simple way to get that neat, elegant look for your belted garment. First, you'll want to make your loops. Think of it like starting to tie your shoelaces, but with a bit more intention. Then, you'll pull one side through, making sure everything is smooth and even. The key, really, is in the adjustment at the end. You want to gently pull and shape the loops and tails until they look just right, sitting nicely on your waist or wherever the belt is placed.
The goal is to create a bow that looks balanced and intentional, not just thrown together. By following these basic steps, you can achieve a very refined appearance. It's all about making sure the loops are even and the tails fall gracefully. So, in some respects, it's a small detail, but it can certainly elevate your overall look, giving it a bit more flair.
Beyond Gifts - How to Tie a Bow for Craft Projects
Learning how to tie a bow opens up a whole world of possibilities beyond just wrapping presents. These little decorative touches are wonderful for many different craft projects. For instance, if you enjoy making handmade cards, a small, perfectly tied ribbon can add a really sweet dimension. They're also great for scrapbook layouts, giving your memory pages a lovely, textured element, which is pretty neat.
Think about holiday decorations, too. You can use these bows to add some sparkle to your Christmas tree, tying them onto branches for a festive feel. They also work beautifully on wreaths, giving them a welcoming and finished look for your door. And it doesn't stop there; you can attach them to postcards, headbands, or even hair clips for a custom, charming accessory. Basically anything that needs a little extra prettiness can benefit from a well-made bow, you know.
These skills are super useful for various creative pursuits. If you're into sewing, yarn work, or even making things for weddings, like invitations or favors, bows can be a lovely addition. For papercrafts, they provide a nice three-dimensional element that really makes your creations pop. It's really about taking a simple piece of ribbon and transforming it into something that adds charm and character to whatever you're working on, which is quite satisfying.
Troubleshooting Your Bow - How to Tie a Bow Perfectly Straight?
Ever tied a bow and found it looks a bit off-kilter, leaning to one side? It's a common little annoyance, but there's a pretty simple way to make sure your bow sits perfectly straight and looks just right. The secret, basically, lies in how you begin and how you handle the very first steps. It's not nearly as complicated as it might seem, so don't worry about it being too difficult.
Here’s how to make sure your bow turns out straight every time. You start just like you would any other bow, by tying the very first knot. This is the foundation, and getting it snug and even is important. Then, you'll make a loop with one side of the ribbon, preparing for the next step. This initial setup is actually very important for the final appearance, and it's where many people miss a tiny detail.
Now, here is the moment where you really make or break your perfect bow. Instead of just pulling the second loop through haphazardly, you need to be mindful of its direction and how it interacts with the first loop. By paying close attention to this step, you can prevent that frustrating crookedness. It’s all about guiding the ribbon with a bit of care and intention, and you'll find your bows look much more polished, which is really great.
Making it Easy - How to Tie a Bow with Helpful Resources
Making a perfect bow might seem a little bit intimidating at first glance, but it’s actually very straightforward once you get the hang of it. There are lots of helpful guides out there to show you exactly what to do. For instance, you can find step-by-step photo guides that break down each movement, making it super easy to follow along. These visual aids are pretty effective for learning new things, you know.
Many people find video tutorials especially helpful, as you can watch someone demonstrate the process in real-time. There are videos that show you how to tie bow knots for decorating gifts, adding touches to your Christmas tree, or even sprucing up postcards, headbands, and hair clips. Katy, for example, shows a really good way to tie a perfect ribbon bow and finish it with fishtails, which is a nice touch for craft projects like handmade cards. So, you can really see it all come together.
You can also find free printable guides that you can download and keep handy while you're practicing. These often come with clear instructions and diagrams. Martha Stewart, for instance, has a tutorial that walks you through the steps to tying a bow for your gifts, which is a trusted source for many. The best part is, you don't need any special tools to do this; just your hands and some ribbon are enough to get started, which is pretty convenient.
A Few More Ideas for How to Tie a Bow
When you're thinking about how to tie a bow for gifts, consider how the ribbon will sit on the package. Wrapping ribbon around a box can sometimes create little bumps or uneven spots. A good way to keep things smooth is to make sure your ribbon is flat against the surface as you go, and to apply gentle, consistent tension. This helps avoid any unsightly bulges, making your package look much neater, which is really what you want.
Another thing to think about is the kind of ribbon you're using. Some ribbons are quite thin and flexible, perfect for delicate bows, while others are thicker or have a wired edge, giving you a more structured result. The choice of ribbon size and shape can really change the overall appearance of your bow. For instance, a wider ribbon might create a more dramatic statement, while a narrower one could be more subtle, you know, depending on the look you're going for.
You can also experiment with different finishes for your bows, like adding fishtails to the ends of the ribbon. This is a simple cut that makes the ends look more decorative and polished. These little touches can really add some flair to your craft projects, whether it’s a gift, a handmade card, or a scrapbook layout. It's about playing around with the material and finding what you like best, which is actually a lot of fun.

How to Tie a Bow Tie | Bow Tie Knot Tutorial | Step by Step Bow Tie
How To Tie A Simple Bow With Wide Ribbon at Stanley Lee blog
How to Make a Bow with Ribbon? Tips & Step-By-Step Instruction
